Monday, December 30, 2013

Which Piece Do You Want to See on eBay?

Take this Poll and be heard

Help us to know which type of art you're looking for! Show us what you like and what you want.

Which art piece do you want to see offered next on eBay?
  
pollcode.com free polls 


 "Metal Magic" ©Froshay


 "Journey" ©Froshay


"Fire" ©Froshay

Friday, December 27, 2013

What is a Gesture Drawing?

 Use Gesture Drawing to Break out of a Rut

Are you in a rut? Want to loosen up and get your creative juices flowing? Practice gesture drawing with this fun, easy method. Use your television! You can capture gestures of figures, animals, scenery or still life settings whenever you need a creative boost.

Speeds You Up
You'll have to move fast and creating gestures from TV will push you to be quick. All drawing will come from the flash of a partial memory. Sketch while the program is running and move from one gesture to another. 

Hint
Draw small and draw fast. Spend no more than 30 seconds per each sketch. In fact, it's even better if you allow yourself to spend only 10-20 seconds on each gesture for the first 20 sketches.

Keep in mind that these are just practice and most of them will not look like anything in particular. This is totally okay!

The Whole Point of this Exercise
You are Training Your Eyes to See and Your Mind to Hold an Image long enough to capture it in just a few seconds. You are not (I repeat NOT) trying to create a pretty picture so let go of that illusion from the start.

Variation
Once you have warmed up by creating 30 or so small, quick gestures (all while all the images on the TV are in motion) then (and only then), try this variation: Use your DVD or VCR to freeze an image for a closer study. Stop an image and take 45 to 60 seconds to create a gesture, then move on.

Freezing the image from the start and trying to create perfection will be the first inclination for a beginner because of the fear of not getting things 'right'. The analytical (left) brain will try to remain in control and wants to be perfect - but remember - your left brain can't draw.

Creativity is Allowing Yourself to Make Mistakes.
Giving yourself permission to create mistakes relieves you of the burden to be perfect and opens all kinds of doors to Seeing, Growing and most of all, ENJOYING!!


Friday, December 20, 2013

How to Loosen a Stuck Paint Cap

Paint Cap Stuck on Tight?
There are several ways of loosening the cap from a tube of paint, whether it's oil, watercolor or acrylic.

I'm sure you've already had the experience of trying to twist the cap only to have the tube twist and split instead. What can you do?

Well, if you haven't broken the tube, try one of these techniques:
    • First, try getting a better grip on the cap with a rubber gripper (like they sell in the kitchen ware department)
    • Of course you can give it a go with pliers or a nutcracker (handy tools for your paint box)
    • A gentler method might be to invert the tube in water (cool for watercolors - hot water for oils or acrylics), soak for a few minutes and then use the rubber gripper or pliers
    • An old method is to heat the metal threading area using a flame (and I don't recommend this unless you are adult and know what you are doing). You also have to be very careful not to melt the cap...
    By Far the Best Method
    This is the easiest and less troublesome way to handle the situation. Squeeze all the paint up to the top of the tube and roll the tube up snuggly. You can use a Tube Wringer, or run a pencil or brush handle to squeeze the paint towards the lid. Grasp the whole tube with one hand and try unscrewing the cap with that rubber grip, pliers, paint rag, whatever. Having the paint tightly at the top helps to prevent the tube from twisting and breaking.

    Once you have the cap off, clean the dried paint from the threads and from the cap. Rub the threads with petroleum jelly to keep the paint from adhering in the future.

    Still Stuck?
    If all else fails, make sure you've pushed all the paint to the top of the tube, then cut the bottom end off of the tube. Use what you need and then close the tube, cover with plastic wrap and secure the bottom with a bulldog clip.

    And finally, save a few of your good caps from empty tubes - just in case you've split (or melted) a cap.

    Friday, December 13, 2013

    How to Donate Art for Charity

    Last week I posted Donate Your Art and Get Great Exposure! I've had questions from readers who really want to donate their art to a great cause and asked how to go about it...

    Is This a Good Thing for my Career?"

    There is one thing you want to keep in mind when donating your Art for charity..... you don't have to just give it all to them. Let them know that you need a certain dollar amount for the work, so you aren't working at a loss - unless you are willing to donate your work as well as the proceeds.

    It's okay to ask for, at minimum, the cost of your supplies. They can start the bidding or auction at your cost, plus a beginning donation from the bidder. 

    "Fire" ©Wendy Froshay
    Pricing
    The last time I was asked to donate a giclee (not an original) for a silent auction, my out of pocket expense was $500. That was for printing, color proofing, stretching, framing and delivery costs. I wasn't prepared to donate $500 out of pocket to the charity, however, I was prepared to donate everything over my costs.

    Keep in mind that too high a price can scare bidders away. People often come to auctions looking for a bargain.

    So set the minimum acceptable opening bid and selling price as low as possible. If you need $400, have them start the bid at $250. Let them know that it should only sell when it reaches $400. If it doesn't sell, at least you will have bids. It's totally embarrassing (and looks bad) to have no one bidding on your item.

    Research the Organization
    Do research on what kinds of items the organization normally auctions and how much they usually get for those items. If your costs are higher than what they can get, or what you have to offer is of little interest to bidders, then bids on your item will be low or non-existent.

    If however, what you donate aligns with the organization and it's bidders tastes, you'll have a better chance of it being bought AND, of bidders becoming collectors.

    OUCH!
    I attended an art auction recently featuring some excellent and well known artists. Most starting bids began between $300 and $500 - however one was set at $2,700. This $2,700 piece got no bids.

    The artist was from out of town and had flown across the country with high hopes for the auction. This artist did not do his research. Many other pieces went for much higher than $2,700 - but that piece went home with the Artist.

    Attend a few auctions before donating. It will give you a better understanding of what to donate, what sizes sell better and how the process works.

    Sometimes pieces are raffled off rather than auctioned. Here too you should research the charity - attend some of their functions. Get a feel for the crowd and for the organization.

    Finally - remember to get a receipt for your taxes! 

    Thursday, December 12, 2013

    Two 10 x 10 Metallic Horse Prints For Auction on Ebay w/ Free Shipping!

    Before Thanksgiving, I offered one of my horse prints on eBay and it was a huge success with lots of bids! I had several people who were interested in bidding on other pieces of mine that they love, so I picked a couple and have put two more up! Depending on this this goes, I might do a few more... or these might be the LAST TWO I ever sell like this. So if you're interested ... place a bid!

    10 x 10 Metallic Equine Prints
    Hand Signed on the Back
    Bidding starts at just $0.99!
    FREE SHIPPING anywhere in the U.S.!

    Running Free:

    Racing The Wind:

    Friday, December 6, 2013

    The Hard Truth About Getting Exposure As An Artist

    Winsor ©Wendy Froshay
    I regularly received requests to donate to one "worthy" cause or another. The pitch? Participating in their charitable event will be "good exposure" for me as an artist. 

    Someone once told me that "you can die of exposure." 

    The Letter

    Dear Artist: 

    Each year, our Non-Profit Organization hosts “The Week of the Help-Us-Out”. This week-long campaign features our annual Conference on Helping-Us-Out and the Holiday Brunch (information is attached.)

    Would you consider donating art for our Holiday Brunch Silent Auction. In return, The Non-Profit Project will honor your support at the event and on our website (see Holiday Brunch Invitation for details.) Please see the attached information.

    On behalf of The Non-Profit Organization Board of Directors, I would like to thank you in advance for your consideration.

    Kind regards,
    Fill in Name
    Executive Director

    Koi Tranquility ©Wendy Froshay
    A Better Way to Donate
     
    Dear Executive Director of Non-Profit Organization asking for another Donation,

    I am honored by your request and am frequently contacted for donations.

    Yes, I will consider donating art for your silent auction as long as you offer a starting bid at my suggested market price with 50% of the full market price going to me. Everything above that can go to your cause.

    Past experience has shown me that artistic donations which sell for low amounts tend to develop unrealistically low expectations on the true value of the art for those who attend and those who win the auction.

    My current patrons then become unhappy because their purchases have been devalued... and I lose my buyers. 


    FYI When an artist donates art, the IRS only allows them to deduct the actual cost of supplies to create that piece of art and none of the time, experience, education or overhead - that's nada for services rendered.

    Artists cannot deduct wholesale prices, let alone retail (and trying to figure out exactly how much paint was used per square inch and how much wear on 3 brushes is kind of ridiculous), but such is our tax system. Many organizations who ask for donations from artists do not realize this.

    It is much better for the artist to make an actual cash donation that can be fully deducted rather than to freely donate their art.

    Note to the Artist:
    It's interesting to know that these groups will pay their auctioneers, their staff and workers, printers, and for banquet rooms, plus pretty much everyone else involved - but those who donate are expected to give for free.

    How do you feel about donating your art?

    Wednesday, November 27, 2013

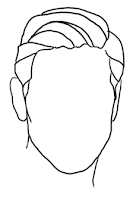
    The Easy Way to Draw Hair

    Drawing Hair
    is Easier than You Think
    Drawing hair can be confusing because we believe that we have to draw each individual hair. At least, that is the way the analytical mind thinks.
     
    Instead, if we use the Creative part of our mind, and look for patterns and
    shapes, then drawing
    hair
    becomes
    simple, easy and fun.

    Simplify what you see by looking
    for segments
    and drawing those
    segments as shapes.


    Look for highlights and draw the shape of the highlights.

    Squint your eyes to see the shadows shapes and then draw them.

    Taming Curly Hair
    Simplify curly hair by combining several shadow shapes into one segment, several curls into one larger curl shape and of course, several highlight segments, into one larger highlight shape.

    By the way..... This same technique applies when painting hair. In the beginning, simplify and paint just shapes. Only at the end of your painting or drawing should you add the detail of a few individual hairs. The viewer's mind will delight in filling in the details.

    Friday, November 22, 2013

    What's the Best Lighting to Use In An Art Studio?


    Lighting to Create Artwork By
    Natural lighting is of course, the best lighting to work in when you are creating any art. However, there is no simple or correct answer for lighting your completed artworks. Understanding theses differences should help you to decide.

    Oil, canvas, pigment and papers are sensitive materials and will deteriorate when exposed to UV light. Infrared isn’t as damaging, but does produce heat which will dry out canvas and crack the paint. 


    Natural Sunlight
    Natural light contains ultraviolet and infrared rays, which can damage works of art. Works on paper (watercolors, prints, photographs, etc) and fabrics are especially vulnerable and can fade rather quickly - especially in direct sunlight. Sunlight’s ability to render color is unmatched because of it’s perfect blend of all natural colors of the spectrum, but for lighting art, it's out of the question.


    Fluorescent Light
    How many of you work under fluorescent lighting all day? Fluorescent lights give off high amounts of ultra violet rays. Not as high as sunlight, true, but high enough to be harmful. They also don't emit light across the entire color spectrum. Have you ever noticed how fluorescent office lighting adds a greyish cast to your complexion? – Well it does the same for the artwork!

    Incandescent Light
    Incandescent lighting enhances warm colors in artwork and washes out the cool colors. If effectively flattens the look of compositions that are predominantly blue, green, purple, etc. While incandescent is less harmful than fluorescent or natural lighting, it's still a poor solution for showing off your artwork. However.... WE look MUCH better under incandescent lighting (and even better under candlelight....)!


    Halogen Light
    Halogen light emits a strong, white light that renders color at levels near that of sunlight. When used in lighting paintings, a low watt halogen based bulb needs to be filtered, adjustable, dim-able and kept indirect. Indirect lighting is less harmful and hot spots are EXTREMELY bad.


    Solution?
    The best solution may be a combination of indirect, low watt, filtered halogen and incandescent lighting. Whatever you do, keep your work out of direct sunlight and watch for that 'bouncing' sunlight.

    Friday, November 15, 2013

    5 Tips for Better Use of Photo Reference In Your Art

    What's Not Good about Using Photos to Create Your Art?
    We tend to believe that photos don't lie, yet photographs show things very differently than the way the eye sees and the mind perceives.


    How photos can lie about what you see:
    Photographs tend to pick up more details and show them much sharper than does the human eye. 


    Photography also flattens the three-dimensionality and distorts (yes photography distorts) your subject. Objects coming toward you look larger while subjects moving away from you appear smaller than normal.

    I often see the tale-tell signs in student work that clearly shows they copied directly from photographic reference. When I comment on it, they usually say, "But that's how it looks in the picture!"

    I then suggest taking 'Artistic License' and changing what the photo shows.

    Here are some hints on how to know what to adjust when using photographic reference:
     
    1 - When working from a photograph, downplay the sharpness of value changes.


    2 - Leave out and soften some of the detail.

    3 - As the subject recedes leave out more and more detail. For example, distant hills or mountains in a landscape should have very little detail.


    4 - Spend time observing your subject in real life. Draw or paint from real life. This may be more difficult to begin with, but if you keep working this way I guarantee you will:
    • Start seeing how values work correctly
    • Begin understanding how even the smallest distance from the viewer will soften details
    • Become aware of color changes (and just how many variations of colors can exist in one subject)
    • Understand how light and shadow affects your subject matter
    • Understand how your subject matter affects light and shadow
    • See three-dimensionally so you can recreate three-dimensionally

     5 - Use the photographs ONLY as reference and study notes.

    If all you have to work from are photos, then keep this knowledge in mind and make the above adjustments in your work.

    Friday, November 8, 2013

    Video: A Love Letter to You

    Today I offer you another path for you to also get out of your own way, whether you are an artist or not.

    Feel free to share this short video with anyone and everyone you care about.
    Watch, enjoy, FEEL BETTER.
    Pay it forward.

    ~ Peace ~


    Photography, text & music © Copyright 2010 Tien Frogget. All rights reserved.

    See more photography at Tien Frogget.com
    Questions? Comments? tf@tienfrogget.com


    Friday, November 1, 2013

    13 Ways to Find Creative Inspiration


    Seeking Inspiration for Art?
    Create your own library of research by collecting through these 12 Inexpensive and Fun avenues. When you have your own library, you have inspiration at your fingertips.
    "Bicycle" Charcoal on paper © Wendy Froshay

    Many artists use the internet for research (and so do I), but I'd like to share with you other ways I enjoy gathering photos, pictures, images of paintings and everyday treasures to draw and paint.

    1 - Go through Old Photos. Especially those black and white images from the past! They are excellent for value studies.

    2 - Browse Thrift Stores and seek out old magazines, books and prints. This is great for your wallet, great for the economy and super terrific for the environment!

    3 - Junk Mail. Believe it or not - go through your junk mail! Lots of eye catching images are sent for just that reason - to catch your eye. So clip them out and save them.
    "Worn Companions" Ink on Bristol © Wendy Froshay

    4 - Visit Yard Sales. You'll find children's books, unique magazines, prints in frames and lots of interesting knick-knacks (by the way, yard sales are fantastic way to get a deal on frames!)

    5 - Got bored kids? Send them on a Scavenger Hunt for magazines and save the pictures that interest you. It'll keep them busy for an hour or so and you'll have lots of fodder when they're through. Have them help you go through and cut out images and place them into categories.


    What's a Scavenger Hunt?
    Yikes! If you don't know what a scavenger hunt is, email me - I'll give you the guidelines (I think I just gave away my age.....)

    6 - No kids? Ask for “toss-aways” from professionals who have waiting rooms (hair salons, physicians, dentists, optometrists, dermatologists - you get the idea). They often have tons of magazines they get for free, and are happy to have someone tote them away when they are done with them (another great way to recycle!)
    "Range Hangs" Ink on Bristol © Wendy Froshay

    TIP
    It's rare that they'll call you when they are ready to throw a stack away, so you'll need to call every once in awhile and be willing to come right away for pick up.

    7 - Wander your home and look for Lost Treasures. Old vases, candles, hats, bowls of fruit, dried flowers, shoes & socks, garden gloves, piles of dishes - you name it! There's loads of things around your home.

    8 - Use your digital camera or smartphone for any excursion. If you are out early in the mornings or late in the evenings then make sure to take your camera with you and collect images of lighting and composition.

    9 - Go for a Walk and gather interesting objects. On my walks I've collected seed pods, pine cones, feathers, dried leaves, and even broken toys.

    "Bartholomew" Ink on Bristol © Wendy Froshay
    10 - Go through your Kids Toys and borrow the fun things. When my kids were toddlers, I use to pull their toys out for my students to use for drawing practice. Toys for young children are simplified into big and chunky shapes and can be easier to work from.

    11 - Pets. Practice doing quick sketches of your pets while they are snoozing. Do closer studies by working from photos of them. Keep using your pet as a subject and you'll greatly improve your observation skills. (By the way, meet Bartholomew - Barthy for short).

    12 - Visit the Library Sales. Libraries often sell older, more tattered books when they gain new ones. You can get some fantastic buys for a fraction of the cost. I've collected shelves of wonderful children's books, many of which are no longer available in print (now that's what I call treasure!)

    "Cloud Dragon Sketch" Graphite on paper © Wendy Froshay
    13 - Lay on your back in the grass and let your mind Play in the Clouds. Drawing with your eyes or grab your sketch pad and take notes. Don't tell anyone, but I once created a dragon drawing from a cloud I saw through the sun roof of my car. I scribbled as fast as I could at a couple of stop lights before it transformed.

    Catalog Your Images
    Keep pictures, photos and clippings that you've collected in some kind of easy to find storage system. I started with file folders that had my images broken down into large categories. As my 'library' grew, I broke the bigger files into smaller, more specific genres.


    I also have a tall stack of plastic storage drawers with good research for my students to use during classes. They are labeled generally as People, Landscapes, Florals, Animals, Black & White Studies, Portraiture, Still Life, Drawing Styles, etc.

    Whatever you choose to draw or paint, the more interested you are in your subject matter, the better art you'll create. Take the time to really study your subject from all angles. The more often you do this, the better you'll become at the subjects you love.

    Friday, October 25, 2013

    Moving Past Creative Blocks In Your Art


    Breaking Through Creative Blocks
    As Artists, we tend to be hyper-critical of ourselves and our work. Sadly, I often see how this stunts the growth of many wanna-be artists. One of my greatest joys in life is nurturing my students to overcome this creative block.

    Throughout my many years of teaching, I've watched as student after student blossoms into the delight of allowing their creativity to expand.

    And last night I experienced the EUPHORIA that art instructors thrive upon. We were in the final evening of a course and all my students had improved powerfully over the past several weeks. It felt good to be watching them discover their own talents. Each and every one of them had grown so much!

    Getting Out of Your Head and Into Your Heart 
    One student stood out... Her first drawing of the evening was awkward, stiff and unsure. I sat with her and gently offered her the idea of relaxing with the process, loosening her 'grip' on "how it should look" and walked her through the simple steps I'd been introducing to her throughout the course.

    The next time I passed her I got chill bumps! Her work had moved from inhibited to masterful!

    She'd quantum leaped - and not just once, but time after time she repeated creating the beauty she was allowing. She'd not only opened her eyes, she'd open her heart.

    Sweet!

    Friday, October 18, 2013

    Art Info: Light Influences Color

    Local Color Changes with the Light

    The main light source is a major influence on the local color of your subject. Is the sun the main light source? What time of day is it? What's the weather like?

    Is the main light source a lamp? What kind of lighting does it provide? Cool, warm or natural?

    An easy observation is the 'color' of a body of water on a sunny day verses on a cloudy day. What differences do you see?

    The key to really knowing how different lighting affects color is through constant observation.

    Think about this:
    The sky is Blue... the trees are Green... the sun is Yellow. What color is water in a glass? Yeah? Then why is the ocean blue? ...or is it?

    Friday, October 11, 2013

    Can You Improve Your Art By Squinting?

    Squint to Simplify

    Squinting allows you to view your subject with less detail thus increases your sensitivity to value changes and color variations. It simplifies shapes, values and color by reducing distraction details.

    By including a few squints, you can concentrate on large, basic, overall shapes. Squinting reduces colors to values and simplifies them into highlights and shadow masses because it eliminates much of the middle values.

    This simplification of your shapes and values will help to unify your art and will compel you to focus on your composition rather than on the details.


    TIP:   If you wear glasses, take them off to blur your focus.


    Friday, October 4, 2013

    Improve Your Art By Avoiding Screaming Colors

    "When Everyone is Shouting, No ONE is Heard"

    I learned this from one of my college art instructors and I pass it forward to all of my students. Truer words were never spoken!

    If all of your colors are intense and bright (screaming), then no one AREA stands out. You have no focal point and your viewer doesn't know where to look. If all you have is chaos, your viewers eye will run away screaming.

    Offer Resting Areas
    Kind of like a roller coaster, if you don't have some slower, resting areas, there is no thrill for the BEST part. Bright color stands out best against grayed colors. Grayed colors are your resting areas.

    So save the intensity for your focal point.

    'Nuff said.


    Friday, September 27, 2013

    Art Tips: How to Keep Your Acrylic Paint Moist


    Here is an inexpensive Tip for keeping your Acrylic Paints soft for days.
    from JAQUI MILES 


    You will need:
    • A plastic box with a tightly closing lid
    • Thick paper towels - use several layers
    • Freezer Paper
    Cut your thick, moisture holding paper (Paper Towels) and several sheets of freezer paper to a size that will fit in the base of your plastic box.

    Lay the Paper Towel in the base of your plastic box. Thoroughly soak the paper towel with water and then drain off the excess.

    Add 1 (one) sheet of Freezer Paper on top of the wet Paper Towel. Save the other sheets of Freezer Paper for when you are ready for a clean palette.

    The layer of thick wet paper underneath adds enough moisture to keep the paints from drying quickly while you paint AND will keep your acrylics wet for days (sometimes even a week) if the box is closed well.


    The Freezer Paper has a waxie finish and is heavier so it will hold up to under use.


    Tip: Don't try this with wax paper - It's too flimsy and falls apart!

    Thanks Jaqui!

        Jaqui is a Graphic Designer/Graphic Artist/Painter/Jewelry Designer

    Friday, September 13, 2013

    Artist Reference: Drawing Pencils Explained

    They Never Were Lead!
    The first pencils were created some time before 1665. They were made from sticks cut from a high quality natural graphite deposit, which was then wrapped in either string or sheepskin. At the time it was thought to be lead. Later, the graphite (a form of carbon), was inserted into wooden sticks that had been hollowed-out by hand.

    Today, the "lead" of a pencil is usually made from blend of powdered graphite, clay and water that is shaped into thin rods, dried, kiln-fired and then wrapped in a wood casing. 

    Grading
    The hardness or softness of the graphite core depends upon how much clay is added into the mix.


    Harder pencils - indicated by the H code, produce fainter marks and the higher the number, the lighter the lines. In other words, if H2 produces a light grey mark, H4 will be even lighter and H6 will be lighter still.


    Pressing harder with these pencils will only crease your paper rather than make darker lines.

    Softer pencils are indicated by a B coding and the graphite becomes softer as the number increases. The higher the number, the darker the lines will be (and the more easily they can be smudged).


    Remember it this way..... H (for Hardness) ...... B (for Blackness)


    School Pencils
    Those good ol' yellow pencils you purchase for back to school as a kid? They are usually smack in the middle and may be considered an H or HB, although I've owned some that marked more like a 2H.


    I prefer the softer range myself because I have a light touch. I usually begin a drawing with a 2B and then move into the 4B and 6B when I'm ready to darken up my line work and create shading.

    Woodless Pencils
    Woodless pencils are solid graphite coated with thick varnish. They are very versatile, also come in various degrees of softness, are ideal for laying in large areas quickly and can be sharpened with a normal pencil sharpener.

    Friday, September 6, 2013

    How to Clean Dried Paint out of Brushes

    How to Clean Art Brushes
    One of my students showed up at class today and announced..... "I've made an Expensive Mistake!"

    She'd taken her brushes home from art classes the week prior and had forgotten to clean them. The paint had dried and the bristles were hard and twisted.


    Her face lit up when I told her I could fix that for her but then fell when I told her that the brushes would have to soak for about 24 hours . . . she had no clean brushes to use for class.

    What is a Ferrule?
    Fortunately for her, the paint was not deeply embedded in the ferrule. (The ferrule is the metal portion of the brush that attaches the hair to the handle). So I suggested we try something else. 


    I pulled out my trusty Lanolin Hand Cleaner (the type that garage mechanics use to clean the grime from their hands after working on cars), and squeezed a small amount in the palm of my hand.

    I worked the brush back and forth through the cleaner - and voila! - the paint came free.

    I use this to do a final cleaning of all my brushes and then wash them in cool water with soap before putting them away. It is especially useful when I've gotten paint deep down into the ferrule.

    You can purchase lanolin hand cleaner at any automotive supply store - just make sure to get the kind that does NOT have grit (which will ruin your brushes).

    You can also buy it on Amazon here:


    Getting Oil Paint out of Clothes
    A long time ago - in an age far, far away - I once managed to get a whole pile of green oil paint all over the front of an orange top I was wearing.

    A newbie to painting, I had no idea what to do. I picked up my lanolin hand cleaner and rubbed it into the shirt, which made an even bigger mess. Figuring that the shirt was ruined, I tossed the shirt into a corner by my washing machine and left it for about a week.

    The next time I did laundry, I tossed the orange shirt in with some old rags and to my amazement ALL THE PAINT CAME OUT! I was stunned!

    I've even managed to get small amounts of dried paint out of clothing by rubbing the cleaner into the area and leaving it for a day before washing. 

    A Word of Caution
    Lanolin hand cleaners have a solvent in them, so you'll need to be careful in handling them. Use them in a well ventilated area, keep them away from flames, keep away from children, avoid eye contact, don't take internally, etc. Always read and follow the directions on all of your art products before use.

    Other Ways to Clean Paint from Brushes
    I've also heard that fabric softener works really well and I'm going to try this sometime.

    If you have any other cures for dried paint - please share with others by leaving a comment. I'll give it a try and report back on this blog.

    Friday, August 30, 2013

    Artists Reference: Adding Depth with Rich Blacks

    Swap Flat for Rich
    Using black straight out of the tube will always leave your work looking flat.

    Instead, mix your own rich blacks in oil painting by using variations of Alizarin Crimson, French Ultramarine, Burnt Umber and Windsor Green.


    With these four colors you can experiment to create:
    • warm blacks
    • cool blacks
    • reddish blacks
    • bluish blacks
    • greenish blacks
    • brownish blacks
    • gray blacks

    Try glazing to create rich blacks to enhance your paintings by adding depth and glow to your work.

    What is your favorite color combination for creating rich blacks?