Wednesday, November 27, 2013

The Easy Way to Draw Hair

Drawing Hair
is Easier than You Think
Drawing hair can be confusing because we believe that we have to draw each individual hair. At least, that is the way the analytical mind thinks.
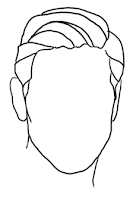
 
Instead, if we use the Creative part of our mind, and look for patterns and
shapes, then drawing
hair
becomes
simple, easy and fun.

Simplify what you see by looking
for segments
and drawing those
segments as shapes.


Look for highlights and draw the shape of the highlights.

Squint your eyes to see the shadows shapes and then draw them.

Taming Curly Hair
Simplify curly hair by combining several shadow shapes into one segment, several curls into one larger curl shape and of course, several highlight segments, into one larger highlight shape.

By the way..... This same technique applies when painting hair. In the beginning, simplify and paint just shapes. Only at the end of your painting or drawing should you add the detail of a few individual hairs. The viewer's mind will delight in filling in the details.

Friday, November 22, 2013

What's the Best Lighting to Use In An Art Studio?


Lighting to Create Artwork By
Natural lighting is of course, the best lighting to work in when you are creating any art. However, there is no simple or correct answer for lighting your completed artworks. Understanding theses differences should help you to decide.

Oil, canvas, pigment and papers are sensitive materials and will deteriorate when exposed to UV light. Infrared isn’t as damaging, but does produce heat which will dry out canvas and crack the paint. 


Natural Sunlight
Natural light contains ultraviolet and infrared rays, which can damage works of art. Works on paper (watercolors, prints, photographs, etc) and fabrics are especially vulnerable and can fade rather quickly - especially in direct sunlight. Sunlight’s ability to render color is unmatched because of it’s perfect blend of all natural colors of the spectrum, but for lighting art, it's out of the question.


Fluorescent Light
How many of you work under fluorescent lighting all day? Fluorescent lights give off high amounts of ultra violet rays. Not as high as sunlight, true, but high enough to be harmful. They also don't emit light across the entire color spectrum. Have you ever noticed how fluorescent office lighting adds a greyish cast to your complexion? – Well it does the same for the artwork!

Incandescent Light
Incandescent lighting enhances warm colors in artwork and washes out the cool colors. If effectively flattens the look of compositions that are predominantly blue, green, purple, etc. While incandescent is less harmful than fluorescent or natural lighting, it's still a poor solution for showing off your artwork. However.... WE look MUCH better under incandescent lighting (and even better under candlelight....)!


Halogen Light
Halogen light emits a strong, white light that renders color at levels near that of sunlight. When used in lighting paintings, a low watt halogen based bulb needs to be filtered, adjustable, dim-able and kept indirect. Indirect lighting is less harmful and hot spots are EXTREMELY bad.


Solution?
The best solution may be a combination of indirect, low watt, filtered halogen and incandescent lighting. Whatever you do, keep your work out of direct sunlight and watch for that 'bouncing' sunlight.

Friday, November 15, 2013

5 Tips for Better Use of Photo Reference In Your Art

What's Not Good about Using Photos to Create Your Art?
We tend to believe that photos don't lie, yet photographs show things very differently than the way the eye sees and the mind perceives.


How photos can lie about what you see:
Photographs tend to pick up more details and show them much sharper than does the human eye. 


Photography also flattens the three-dimensionality and distorts (yes photography distorts) your subject. Objects coming toward you look larger while subjects moving away from you appear smaller than normal.

I often see the tale-tell signs in student work that clearly shows they copied directly from photographic reference. When I comment on it, they usually say, "But that's how it looks in the picture!"

I then suggest taking 'Artistic License' and changing what the photo shows.

Here are some hints on how to know what to adjust when using photographic reference:
 
1 - When working from a photograph, downplay the sharpness of value changes.


2 - Leave out and soften some of the detail.

3 - As the subject recedes leave out more and more detail. For example, distant hills or mountains in a landscape should have very little detail.


4 - Spend time observing your subject in real life. Draw or paint from real life. This may be more difficult to begin with, but if you keep working this way I guarantee you will:
  • Start seeing how values work correctly
  • Begin understanding how even the smallest distance from the viewer will soften details
  • Become aware of color changes (and just how many variations of colors can exist in one subject)
  • Understand how light and shadow affects your subject matter
  • Understand how your subject matter affects light and shadow
  • See three-dimensionally so you can recreate three-dimensionally

 5 - Use the photographs ONLY as reference and study notes.

If all you have to work from are photos, then keep this knowledge in mind and make the above adjustments in your work.

Friday, November 8, 2013

Video: A Love Letter to You

Today I offer you another path for you to also get out of your own way, whether you are an artist or not.

Feel free to share this short video with anyone and everyone you care about.
Watch, enjoy, FEEL BETTER.
Pay it forward.

~ Peace ~


Photography, text & music © Copyright 2010 Tien Frogget. All rights reserved.

See more photography at Tien Frogget.com
Questions? Comments? tf@tienfrogget.com


Friday, November 1, 2013

13 Ways to Find Creative Inspiration


Seeking Inspiration for Art?
Create your own library of research by collecting through these 12 Inexpensive and Fun avenues. When you have your own library, you have inspiration at your fingertips.
"Bicycle" Charcoal on paper © Wendy Froshay

Many artists use the internet for research (and so do I), but I'd like to share with you other ways I enjoy gathering photos, pictures, images of paintings and everyday treasures to draw and paint.

1 - Go through Old Photos. Especially those black and white images from the past! They are excellent for value studies.

2 - Browse Thrift Stores and seek out old magazines, books and prints. This is great for your wallet, great for the economy and super terrific for the environment!

3 - Junk Mail. Believe it or not - go through your junk mail! Lots of eye catching images are sent for just that reason - to catch your eye. So clip them out and save them.
"Worn Companions" Ink on Bristol © Wendy Froshay

4 - Visit Yard Sales. You'll find children's books, unique magazines, prints in frames and lots of interesting knick-knacks (by the way, yard sales are fantastic way to get a deal on frames!)

5 - Got bored kids? Send them on a Scavenger Hunt for magazines and save the pictures that interest you. It'll keep them busy for an hour or so and you'll have lots of fodder when they're through. Have them help you go through and cut out images and place them into categories.


What's a Scavenger Hunt?
Yikes! If you don't know what a scavenger hunt is, email me - I'll give you the guidelines (I think I just gave away my age.....)

6 - No kids? Ask for “toss-aways” from professionals who have waiting rooms (hair salons, physicians, dentists, optometrists, dermatologists - you get the idea). They often have tons of magazines they get for free, and are happy to have someone tote them away when they are done with them (another great way to recycle!)
"Range Hangs" Ink on Bristol © Wendy Froshay

TIP
It's rare that they'll call you when they are ready to throw a stack away, so you'll need to call every once in awhile and be willing to come right away for pick up.

7 - Wander your home and look for Lost Treasures. Old vases, candles, hats, bowls of fruit, dried flowers, shoes & socks, garden gloves, piles of dishes - you name it! There's loads of things around your home.

8 - Use your digital camera or smartphone for any excursion. If you are out early in the mornings or late in the evenings then make sure to take your camera with you and collect images of lighting and composition.

9 - Go for a Walk and gather interesting objects. On my walks I've collected seed pods, pine cones, feathers, dried leaves, and even broken toys.

"Bartholomew" Ink on Bristol © Wendy Froshay
10 - Go through your Kids Toys and borrow the fun things. When my kids were toddlers, I use to pull their toys out for my students to use for drawing practice. Toys for young children are simplified into big and chunky shapes and can be easier to work from.

11 - Pets. Practice doing quick sketches of your pets while they are snoozing. Do closer studies by working from photos of them. Keep using your pet as a subject and you'll greatly improve your observation skills. (By the way, meet Bartholomew - Barthy for short).

12 - Visit the Library Sales. Libraries often sell older, more tattered books when they gain new ones. You can get some fantastic buys for a fraction of the cost. I've collected shelves of wonderful children's books, many of which are no longer available in print (now that's what I call treasure!)

"Cloud Dragon Sketch" Graphite on paper © Wendy Froshay
13 - Lay on your back in the grass and let your mind Play in the Clouds. Drawing with your eyes or grab your sketch pad and take notes. Don't tell anyone, but I once created a dragon drawing from a cloud I saw through the sun roof of my car. I scribbled as fast as I could at a couple of stop lights before it transformed.

Catalog Your Images
Keep pictures, photos and clippings that you've collected in some kind of easy to find storage system. I started with file folders that had my images broken down into large categories. As my 'library' grew, I broke the bigger files into smaller, more specific genres.


I also have a tall stack of plastic storage drawers with good research for my students to use during classes. They are labeled generally as People, Landscapes, Florals, Animals, Black & White Studies, Portraiture, Still Life, Drawing Styles, etc.

Whatever you choose to draw or paint, the more interested you are in your subject matter, the better art you'll create. Take the time to really study your subject from all angles. The more often you do this, the better you'll become at the subjects you love.